In a follow up to our previous blog post, Top 10 Tips For Designing Injection Molded Plastic Parts, I have listed 10 more advanced tips for designing plastic injection molding parts that can be important considerations for your next injection molded part design.
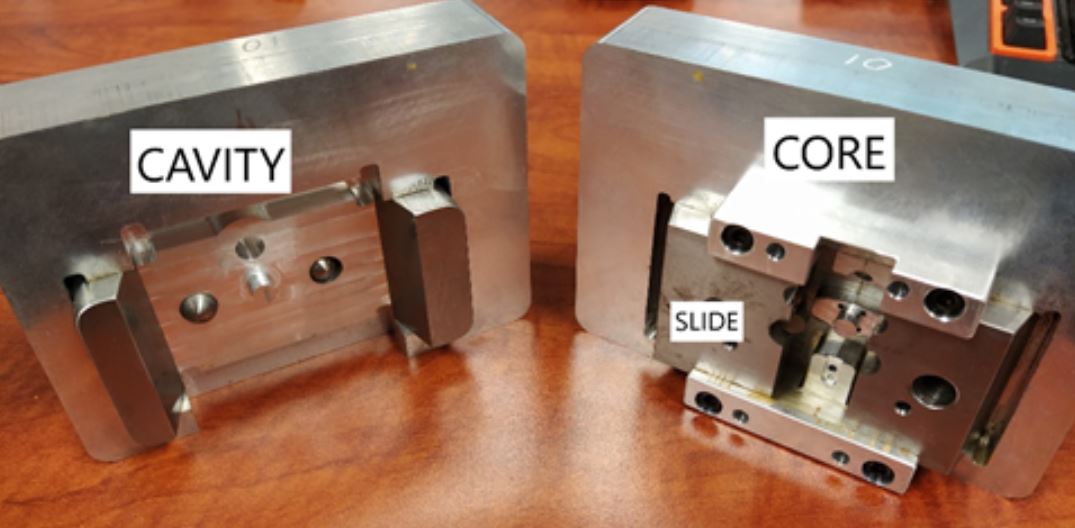
1. Tool-bound features are your friend! On injection molded parts, groups of features that are formed by the same piece of the mold (cavity, core, slide, etc) can be held to a tighter relative position tolerance than a group of features that are formed by different parts of the mold. For example, a boss formed by the cavity cannot be held to as tight of a positional tolerance relative to a hole formed by the core as it could be to a hole formed by the cavity. Use this to your advantage when designing sets of features that need to have high relative tolerances such as sets of gear posts.
2. Pass-cores simplify molds. Pass-cores are parts of the mold where one side of the mold passes through a piece of the part and shuts off in the opposing side leaving a hole in your part. This allows you to create overhangs for features like snaps, or holes in a higher draft side surface while still having a low-cost open shut mold. Some designs get very creative with pass cores and can accomplish complex features such as bores for shafts that are orientated orthogonal to the tool action direction without needing slides.
A part that extensively utilizes pass-cores to create overhangs while remaining moldable with a 2-piece mold
3. Molded-in texture improves cosmetics. Visible surfaces can be molded with an inherent texture. The advantage of textured parts includes not showing fingerprints, hiding part blemishes like sink, and being able to contrast molded-in text and designs with opposing polished regions. However, surfaces with molded-in texture generally require more draft angle than a polished surface. There are quite a few molding standards for textures including SPI (US) and VDI (German), some more detailed reference material can be found here: https://upmold.com/vdi-3400-vs-spi-finish-surface-roughness-comparison/
4. Ultrasonic welding creates sealed enclosures. Ultrasonic welding of plastic assemblies includes pressing two compatible parts into contact with each other while supported in a tooled fixture. The parts generally need to be designed for ultrasonic welding, ideally including having a singular welding plane and energy directors on one part to cause the weld. One part is then excited with ultrasonic vibrations to locally fuse parts where the energy directors contact the opposing part. The use of ultrasonic welding can create very strongly bonded assemblies that can be weatherproof for a low cost. Be aware that amorphous resins, like ABS, will generally bond better than semi-crystalline, like Poly Propylene (PP), and that the two resin types have different optimal energy director geometry for different weld requirements. It is best to consult with your ultrasonic welding vendor to optimize your weld geometry for your specific application.
5. Prototype with 3D printed parts for fitment. 3D printers can create very useful prototypes of parts designed for molding. Stereolithography (SLA) can produce very fine features and can have a smooth surface finish that is great for simulating part fitment and function. Multi Jet Fusion (MJF) can create parts that have nearly the same strength and flexibility properties a molded nylon part.
6. Prototyped parts perform differently than molded parts. 3D printed parts will have different wear, friction and tolerance properties. Additionally, they will lack features found only in molded parts, such as knit lines that can be a problematic zone in a molded part caused when the flow of plastic around a hole rejoins on the opposite side and solidifies with a lower strength than the base flow. Due to these differences, testing of designs with 3D printed parts needs to be done with consideration that the test data may not represent how a molded part would have performed.
7. Use Family Molds to save money. Family molds are when two or more different parts are shot in the same mold. Family molds are great if you are molding a few parts of similar volume out of the same material and want to reduce your cost on molds, especially in low volume situations. However be especially careful that a good mold-flow analysis is performed to make sure that all the parts fill properly.
8. Work with a molder to select a resin. Every resin has so many varieties and potential additives for changing things like UV exposure resistance, UL fire rating, impact properties, colors, etc. It is almost always best to give a list of requirements to the molder on the resin and have them find something that meets the product requirements.
9. Semi-crystalline resins shrink more. When designing high precision parts, keep in mind that semi-crystalline resins like Nylon and POM generally shrink and warp more than amorphous resins like ABS and Polycarbonate and it will be harder to achieve equivalent tolerances. In general, semi-crystalline resins will have better chemical resistances and work better as bearing materials, but due to their achievable tolerances in molding, you may need to use an amorphous resin when you are near the limits of achievable tolerances of the injection molding process.
10. Multi-shot parts can create a lot of function beyond cosmetics. Multi-shot parts are single parts that are composed of multiple resins. Multi-shot parts can add a lot of functionality to your design such as integrating light pipes or adding softer material for grip or cushioning, or even just adding more colors to a part.
Toothbrushes are a great example of multi-shot parts including resins with very different stiffnesses
For even more tips, make sure you check out our previous blog post to learn more about designing injection molded plastic parts!


