This blog is written for LabVIEW programmers familiar with LabVIEW Projects, case structures, enums, clusters, custom controls (.ctl), and non-reentrant VI’s (virtual instruments). Classes are an underutilized but useful tool in LabVIEW. Those not comfortable with object-oriented programming may avoid the use of classes, but there are some common use cases where classes are simple to use and extremely helpful. This article will describe how to convert a Timer VI (virtual instrument) to a timer class to simplify the effort of adding multiple timers to a design.
Timer VIs are very common in LabVIEW applications. The most common design pattern used is the functional global variable (FGV). If the application requires more than one timer, then multiple copies of the FGV Timer must be made with unique names due to the non-reentrant requirement of FGVs. Duplicating VIs can be avoided if the FGV Timer is converted to a Timer LabVIEW Class.
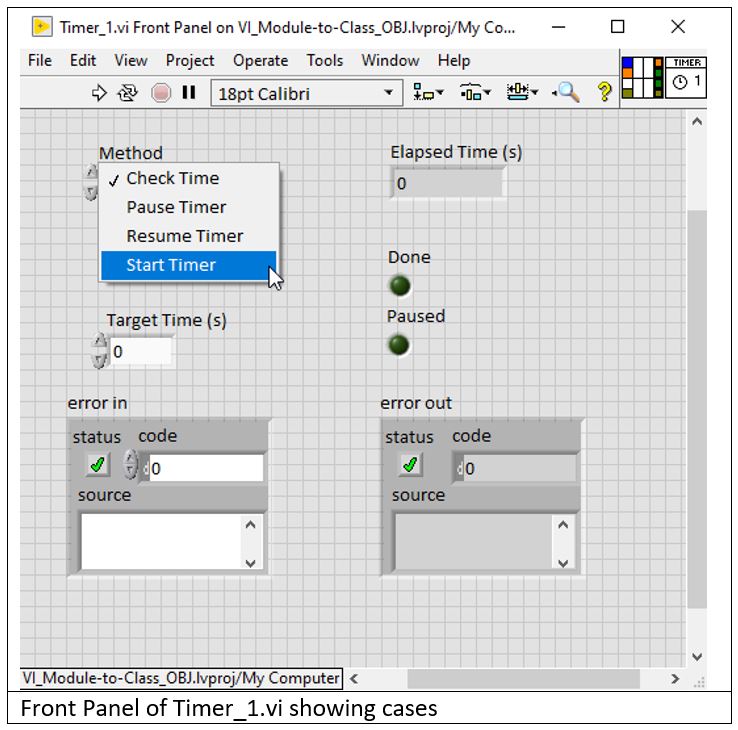
This example will demonstrate how to convert a FGV Timer VI into a LabVIEW class. Our example timer (Timer_1.vi) contains a Cast strutcure with four Cases: Start Timer, Check Time, Pause Timer, and Resume Timer.
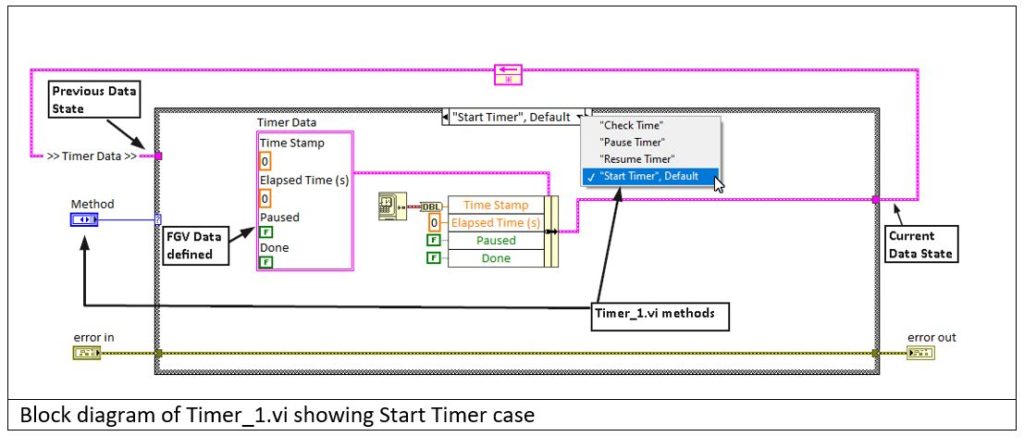
The Timer_1.vi has an enum, called Method, which contains a list of names for each Case of the of the Case structure. A text control will work as well but for this example we are using enum. Data is defined in a cluster, and each case acts on that data in a defined way. Below shows the ‘Start Timer’ case where the action is to initialize the data. Note, cases are referred as Methods in the pictures below.
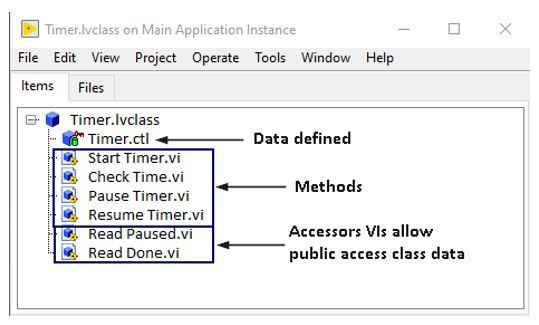
The LabVIEW Timer class is just like the Timer_1.vi. It contains a collection of data (cluster), and methods (cases) that interact with the data. The basic structure of the Timer class is shown below:
The following steps are used to create the Timer Class:
- Create Class
- Define Data
- Save Class
- Create Methods
- Add code to the Methods
- Add Member Access to class data
1. Create Class
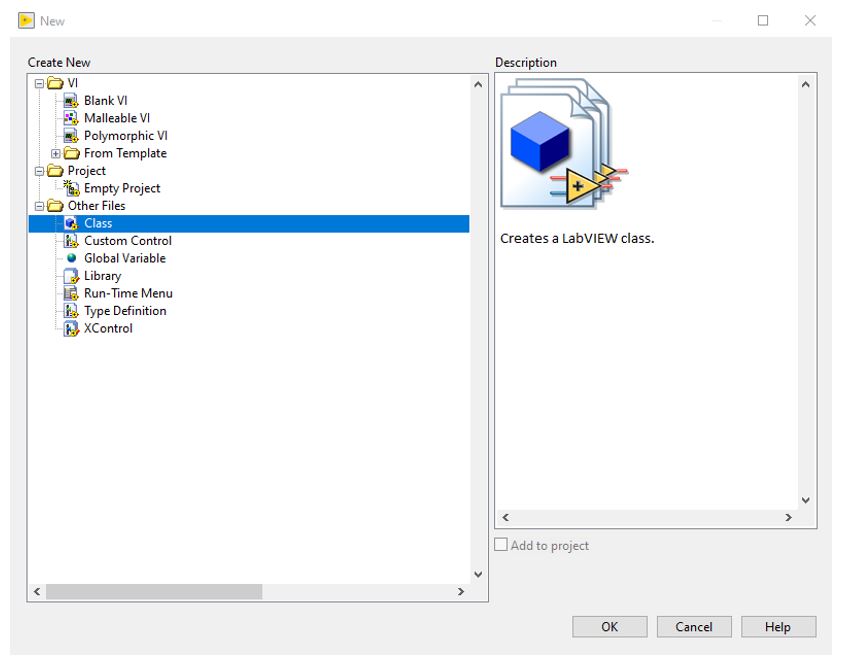
To create a new class, start from your existing project window or an opened VI. Go to File:New and select Class.
Enter a name for the class. In this example it will be called Timer:
2. Define Class Data
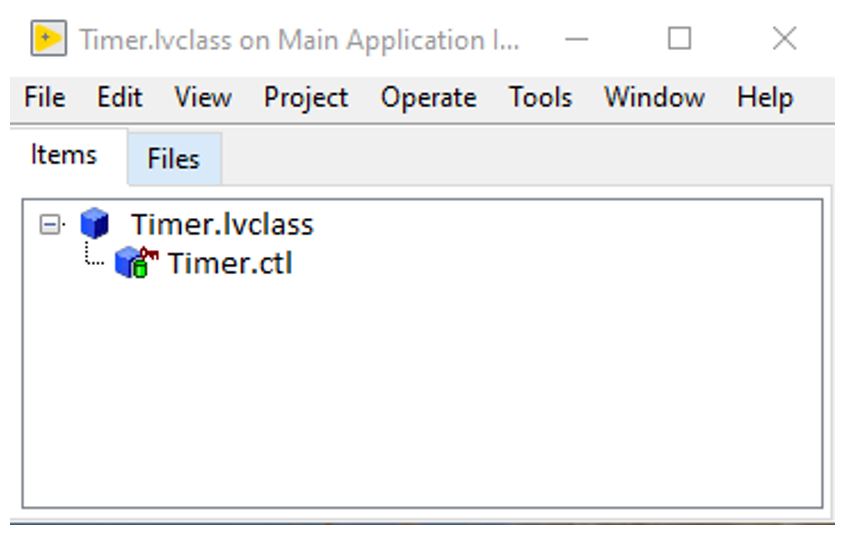
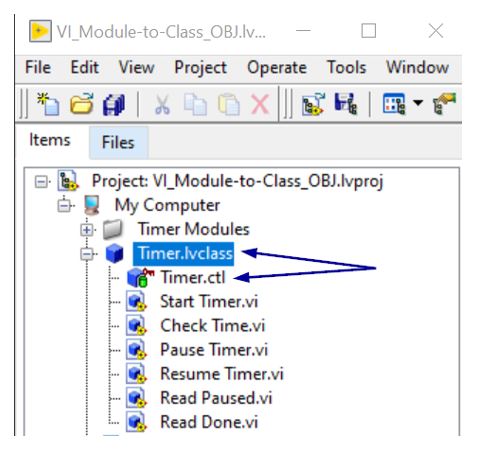
When the Timer class is created, a Timer.ctl is automatically created with an empty cluster. The Timer.ctl defines the data used in the class. Double click on Timer.ctl and enter the data that will be used. This is the same data that is in the Timer_1.vi. The easiest way is to drag the data in the Timer_1.vi into Timer.ctl. The data can be found in the Start Timer case of the Timer_1.vi:
3. Save Class
Save the Timer class. One thing to keep in mind is the Timer class will contain several VIs:
- Custom control .ctl file
- VI for each method (Case in case structure)
- Accessor VIs to access the data in the class
I would recommend saving the Timer class to a new folder that contains just the files of the Timer class. Otherwise, you could run into a situation where a new class you create will try to overwrite one of your other class files. This typically happens with accessor methods. Accessors are usually Get.VI or Set.VI. Classes can have the same name for methods and accessors as other classes. Create a new folder for each class to avoid any conflicts with existing classes.
4. Create Methods
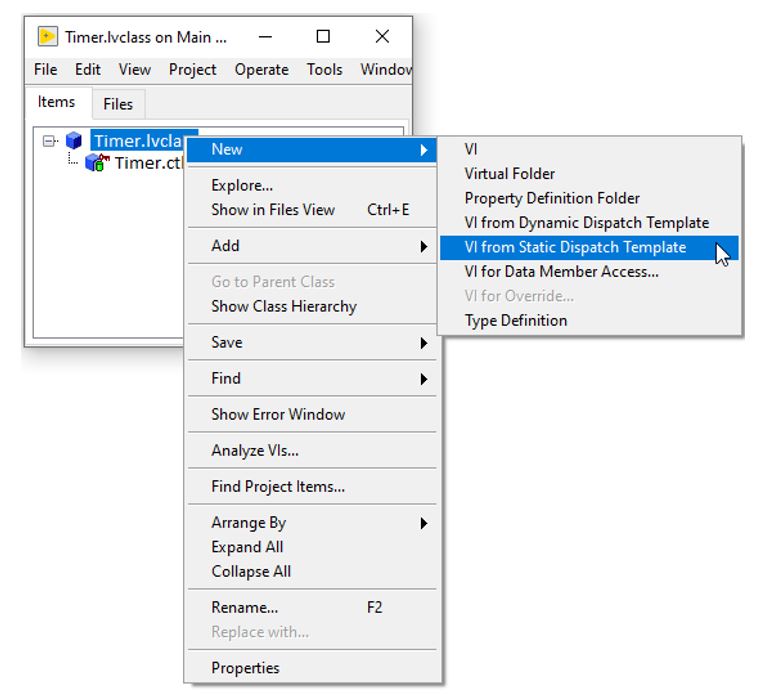
The methods in the class will be the cases in the Timer_1.vi. To create a method right click on Timer.lvclass and select New:VI from Static Dispatch Template:
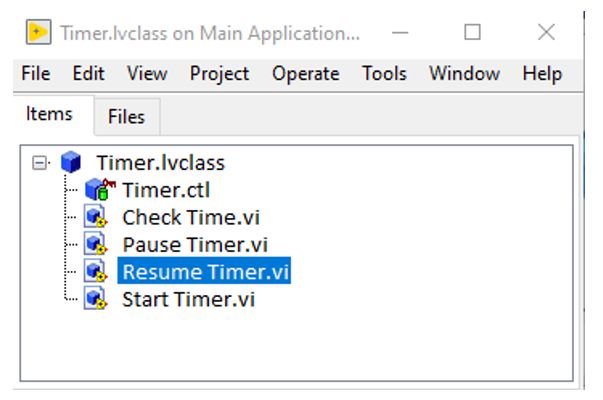
Now a Timer.lvclass:untitled.vi has been created. Save this file as ‘Start Timer’. Use the default save location as it will be in the same location as the Timer.ctl. Repeat this for the other three methods (Cases): Check Time, Pause Timer, and Resume Timer. When all four methods have been created, the Timer class should look like this:
5. Add Code to Methods
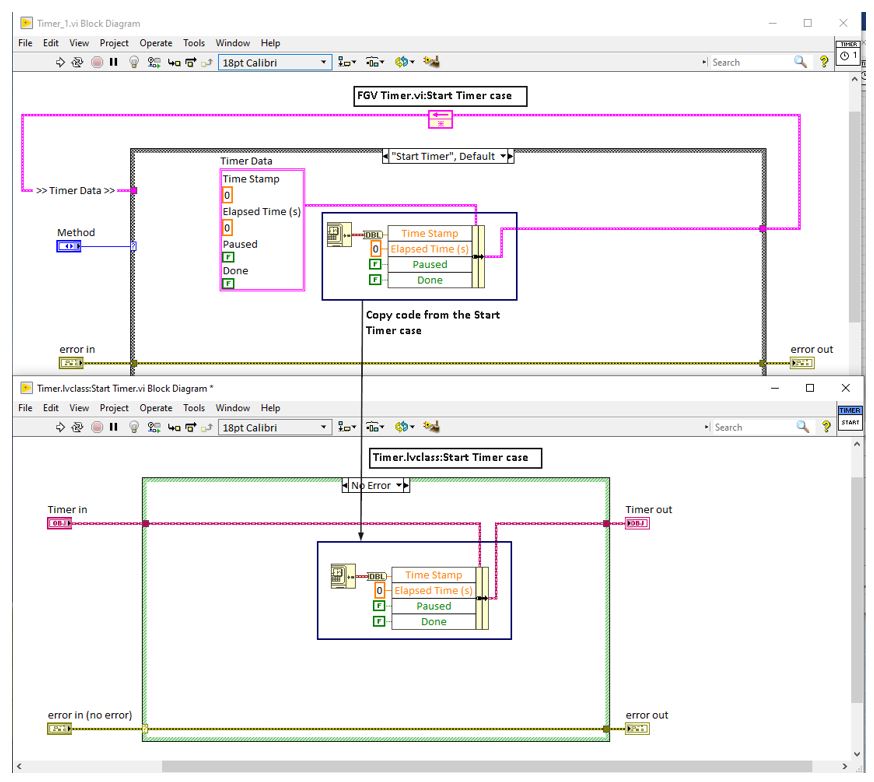
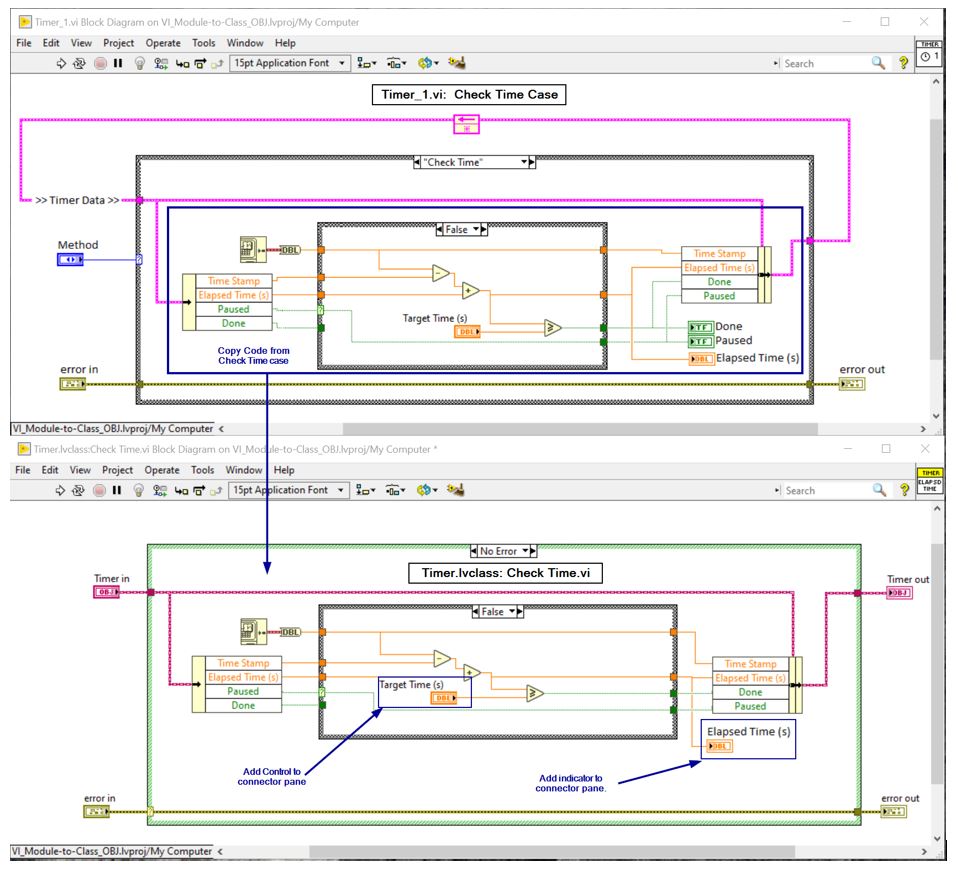
Each method in the Timer.lvclass should correspond to a Case in the case structure of the Timer_1.vi. Copy the code from the Timer_1.vi Cases to each of the Timer class methods. Below are snippets of two of the four methods.
‘Start Timer’ method
‘Check Time’ method:
Repeat this for all the cases in the FGV Timer_1.vi.
6. Access to Class Data
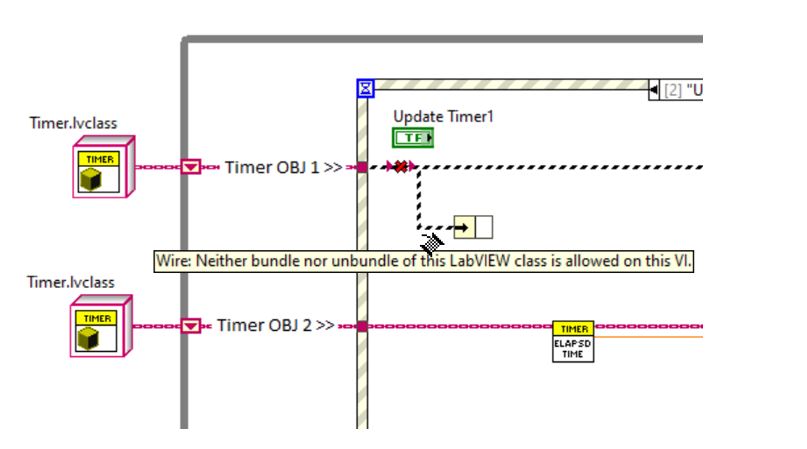
Using an unbundle off the Timer.lvclass data wire will not work because the VI using the unbundle function is not part of the Timer class:
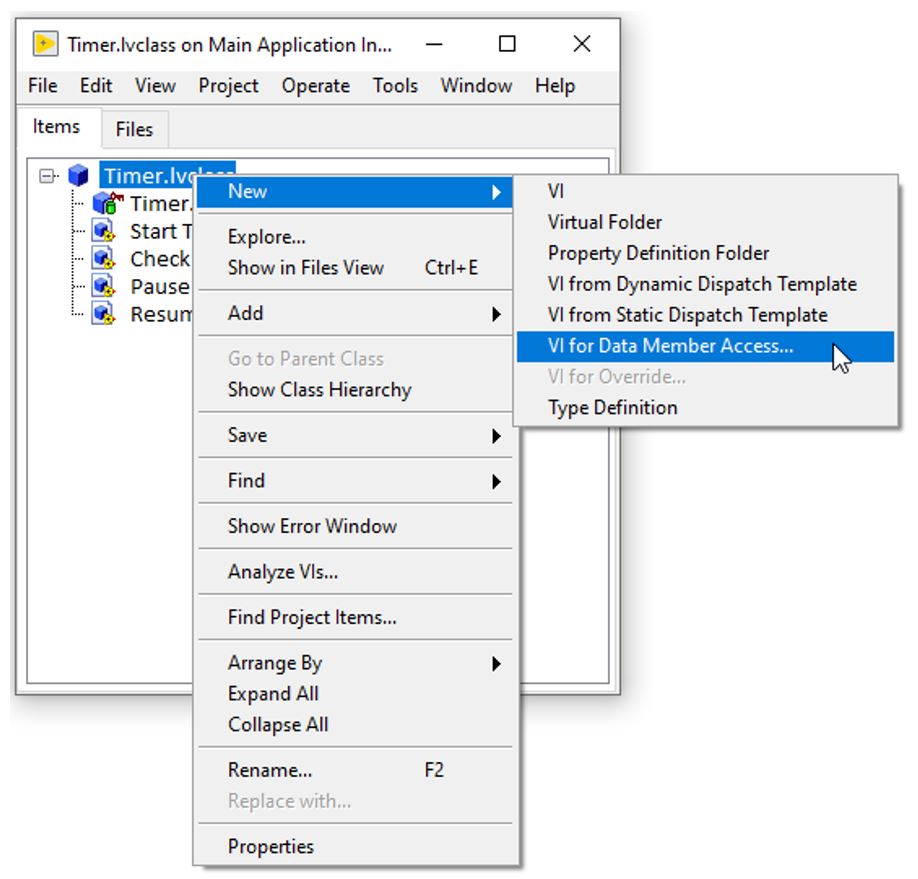
To return Class data to the calling VI, create an accessor method. Create a VI to Data Member Access by right clicking on Timer.lvclass and select New:VI for Data Member Access…
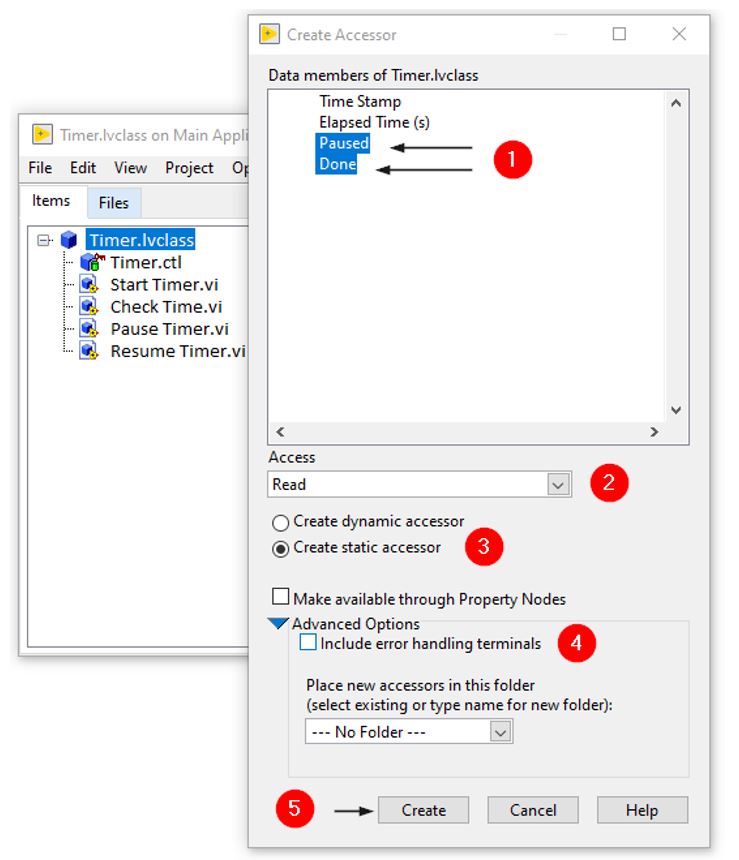
A Create Accessor Dialog box will pop up:
- Select Paused and Done by holding down the Ctrl key as you select the two items.
- Set Access to Read
- Select Create Static accessor.
- Drop down the Advanced options and deselect the ‘Include error handling terminals’.
- Select Create
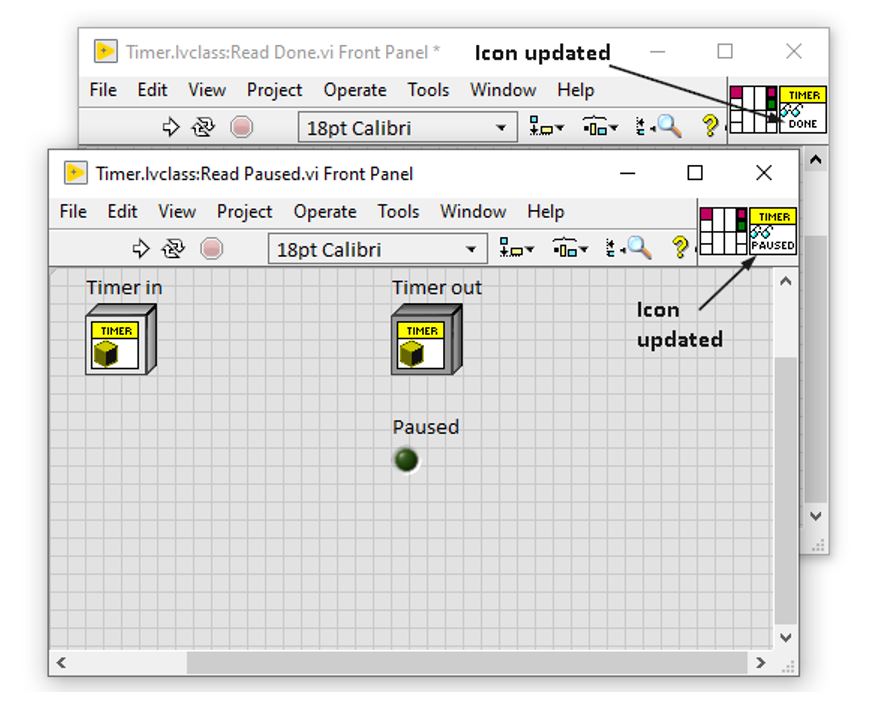
Two VIs are automatically created with their corresponding controls included on the front panel:
- lvclass:Read Paused.vi
- lvclass:Read Done.vi
Update their Icons with the words Done and Paused, as shown below.
Save the accessor VIs using their default name. They will be automatically saved in the same location as the Timer.ctl.
The Timer class is done and should look like this:
How to use the Timer object in your LabVIEW project
To use the Timer object, grab the Timer.lvclass (or Timer.ctl) and drag it into your application.
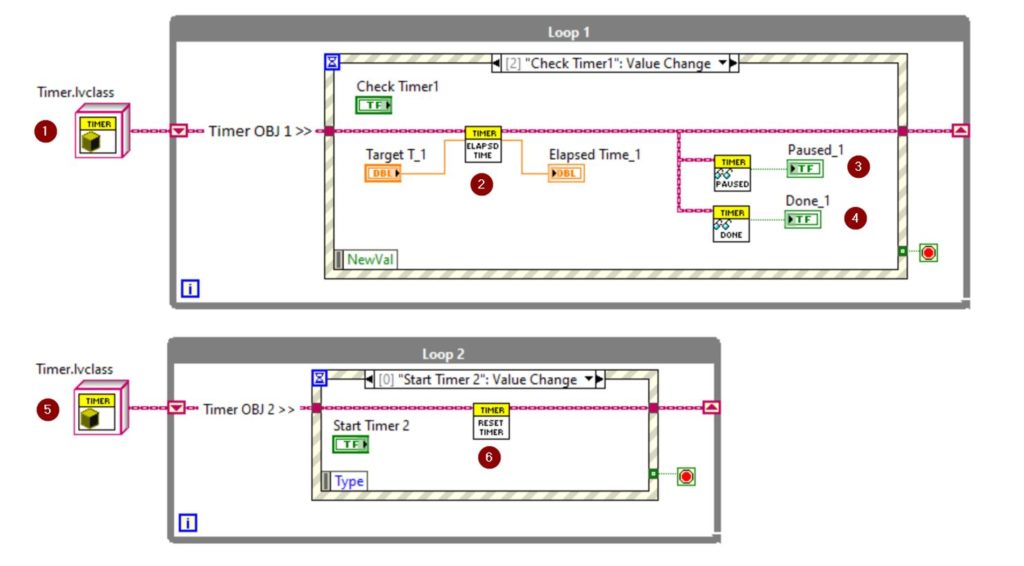
When the Timer class is dropped into the application, an instance of the Timer object is created. Additional Timer objects can be dropped into your application to implement more timers. Below is an example of how to implement two timers, and how to use their methods and accessors.
- An instance of the Timer object (dragged from the Project Tree)
- ‘Check Time’ Method used to calculate elapsed time. This method also allows read/write access to Class Data: Elapsed Time (s)/Target Time (s).
- Accessor method used to read Paused status (accessor created in ‘Access to Class Data’ section)
- Accessor method used to read Done status (accessor created in ‘Access to Class Data’ section)
- Second instance of the Timer object (dragged from the Project Tree)
- ‘Start Timer’ Method used to initialize the second timer
Conclusions
You don’t have to be an object-oriented programmer to gain the benefits of classes in LabVIEW. In this example, creating a timer class reduces the effort to add timers to your design, keeps the code clean, and reduces copies of code. This could easily be extended to other reusable objects for efficient, extensible designs.


